Getting started
Construvex brings your sales, construction progress, payment collections, and RERA compliance into one place, organized the way an Indian real estate project actually works.

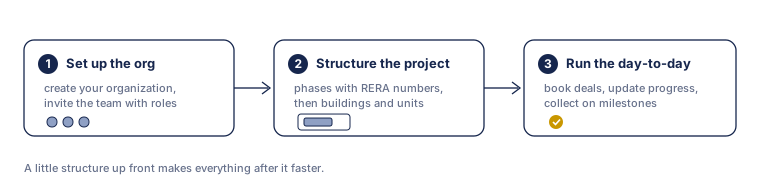
1. Create your organization
Your organization is your company's home in Construvex. Projects, team members, customers and settings all live inside it, kept completely separate from every other organization.
When you first sign in, you'll create your organization by giving it a name. This is a one-time setup; you can refine its details later in Settings.
Note: Construvex is multi-tenant. Your organization's data is walled off from everyone else's, and your team only ever sees your organization.
2. Invite your team
You can invite people at two levels:
- Organization members work across your company. An owner or an admin, for example.
- Project members only need access to specific projects, like a site engineer on one development.
To invite someone, go to Settings → Members, choose Invite member, enter their email, and assign the role that fits their job. They'll receive an email invitation to join.
Roles decide what each person can see and do. For the full picture of roles and the access each plan allows, see Roles & permissions.
3. Set up your first project
A project is one development. Inside it you'll build the structure that mirrors RERA registration: Project → Phase → Building → Unit. Core concepts explains why that shape matters.
To get going:
- Create your project and add its basic details.
- Add one or more phases (each phase is typically its own RERA registration).
- Add the buildings in each phase, then the units in each building.
- Configure your organization's RERA Configuration (under Settings) and progress activity templates so construction tracking is ready, then add each phase's own RERA registration number on its phase form. See the Construction progress guide and the RERA compliance guide.
Tip: Set up your hierarchy and templates first. Sales, payments, and progress all attach to units, so the structure has to exist before any of them will.
Where to go next
- Core concepts: the Project → Phase → Building → Unit hierarchy, customers, and deals
- Sales & CRM guide: leads, deals, and bookings
- Construction progress guide: activities, templates, and RERA categories
- Payments & collections guide: payment plans and milestone-driven schedules
- RERA compliance guide: RERA categories, scope weights, and how phases mirror your registrations